Using CrazyTalk 8 and iClone 6 to bring Cartoon Characters to Life
 |
| The Comedians - by TET. |
One of the reasons I bought the latest version of Reallusion's CrazyTalk 8 is that the promotional videos showed it being used to create 3D, talking head versions of cartoon characters. Something I thought might be an easy way to put my own characters into animation.
I was reminded of that recently so I thought it was time to give it a try. Remembering my comedian characters I thought, that's the ideal place to start with talking head characters.
 |
| Hat-wearing Comedian. |
CrazyTalk 8 (Pipeline)
I've already done a kind of step by step process for creating 3D talking heads in my review of CrazyTalk 8 (Pipeline) so I won't be going through that here. Instead, I'll mention just a few points worthy of note in bringing my characters into CrazyTalk 8.
When creating 3D characters from drawings or other artworks having a side angle is optional. Although I had a side angle drawn I decided to see how things would go if I just imported the front view into CT8. Since I didn't need the character to have a hat for face fitting I erased the lines and gave him a bald head.
 |
| Importing a front view into CT8 for face fitting. |
Importing a single face image causes CT8 to reproduce the face texture on the back of the head, presumably as a way of continuing the hair texture. CT8 won't let you turn a character head past a three-quarter view either way so there's no chance of seeing a face on the back.
Despite this I saved out the face texture, erased the back face and erased the drawn ears as these would be replaced with actual 3D ears.
My intention is not to create a realistic looking version of the character. As much as possible I'm trying to make it look like a black and white cartoon style animation. Once I'd created the initial 3D head I dressed it with the right hat and matching suit (but not the striped tie), changing all the texture colors to grey scales as I went.
I swapped out the drawn eyes for CT8's comic style eyes and added comic style teeth and tongue inside the mouth.
To finish the scene I added the Comic Style Atmosphere (which lights the character directly from the front for a flatter look) and added a blurred graffiti background. You can see the results below with the original drawn image inset.
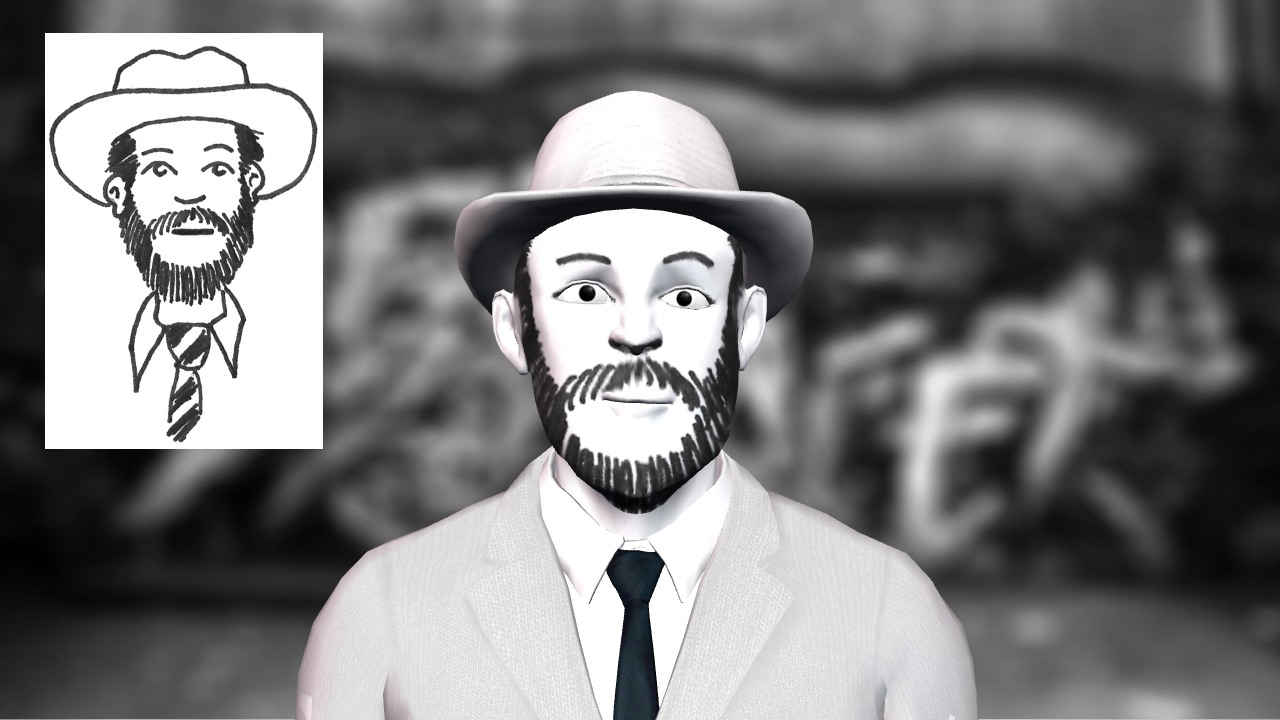 |
| The finished character in CT8. Original drawing inset. |
Character Creator & iClone 6
Once I saw the final character I thought about how the animation would be. I could simply write a funny script for him and animate it in CT8. There's enough ability to move the camera around to make the visuals more interesting than one continuous shot but a stand-up comedian needs an audience. There's no real way to show that in CT8 other than to suggest it with canned laughter.
Since CT8 (pipeline version) allows you to export heads to iClone (via the Reallusion Character Creator) I thought, why not make a full body version of the character, create a scene around him of a stage with an actual audience and then use video editing software to cut in some wide shots and audience reactions? Seemed like a good idea.
Unfortunately importing a 3D head into Character Creator is just that. Importing the head only. See the image below for what that looks like.
 |
| Naked as a Ken Doll in Character Creator. The results of importing a head from CT8. |
I spent a lot of time redressing the character in the CC. Fortunately, the same content packs in CT8 also installed in both the CC and iClone 6 libraries. Although I had to settle for a collar accessory (kind of like those that male waiters wear at a strip club - collar with no actual shirt) because the tie would not sit right on any shirt in the library (with all the controls to adjust it disabled). It didn't really matter a lot as you're only going to see this model from a distance.
Here's the finished result (image below) after much adjusting of textures to make sure everything was in the same greyscale style from CT8.
 |
| The finished Comedian in Character Creator. |
Once you've finished creating your character in the CC it's a one step process to transfer it to iClone and then save it to your custom Avatars folder. The image below shows the character in iClone holding a pose from an animated sequence of him checking out his clothes in a mirror (just one of the many predefined motions you can apply).
 |
| The iClone version of the Comedian Character. |
I haven't yet created an actual set for his wide shots but I have looked at some of the content I've purchased and found a very cosy, premade bar room that I can repurpose as a small comedy club with a bit of work and set decoration.
Hopefully, I can bring you the finished results in a future post.


Comments
Post a Comment